It's no one's goddamn business why you need a steel cage

Break up your Dungeon Stone design with circular grates.

Tired of all your gated rooms looking like crab cages? Mix them up with curves for circular gardens, prisons, gladiator tournaments and boss fights.

Grab the files
Patreon
Thingiverse
MyMiniFactory

Files are available now via Dropbox to our Patreon supporters. Files are posted to Thingiverse and MyMiniFactory later, as time permits. Check back if you don’t see them right away.

Let your creepy light shine

Skyrim's Dragonpriest mask, with custom lighting

This 3D-printed Dragon Priest mask is illuminated with programmable LEDs. Photo by Monica Jones

Before Christmas, Devon dove back into an old hobby — electronics — when he strung year-round programmable LEDs across the front of our house. Now he must illuminate all the things, and nothing is safe.

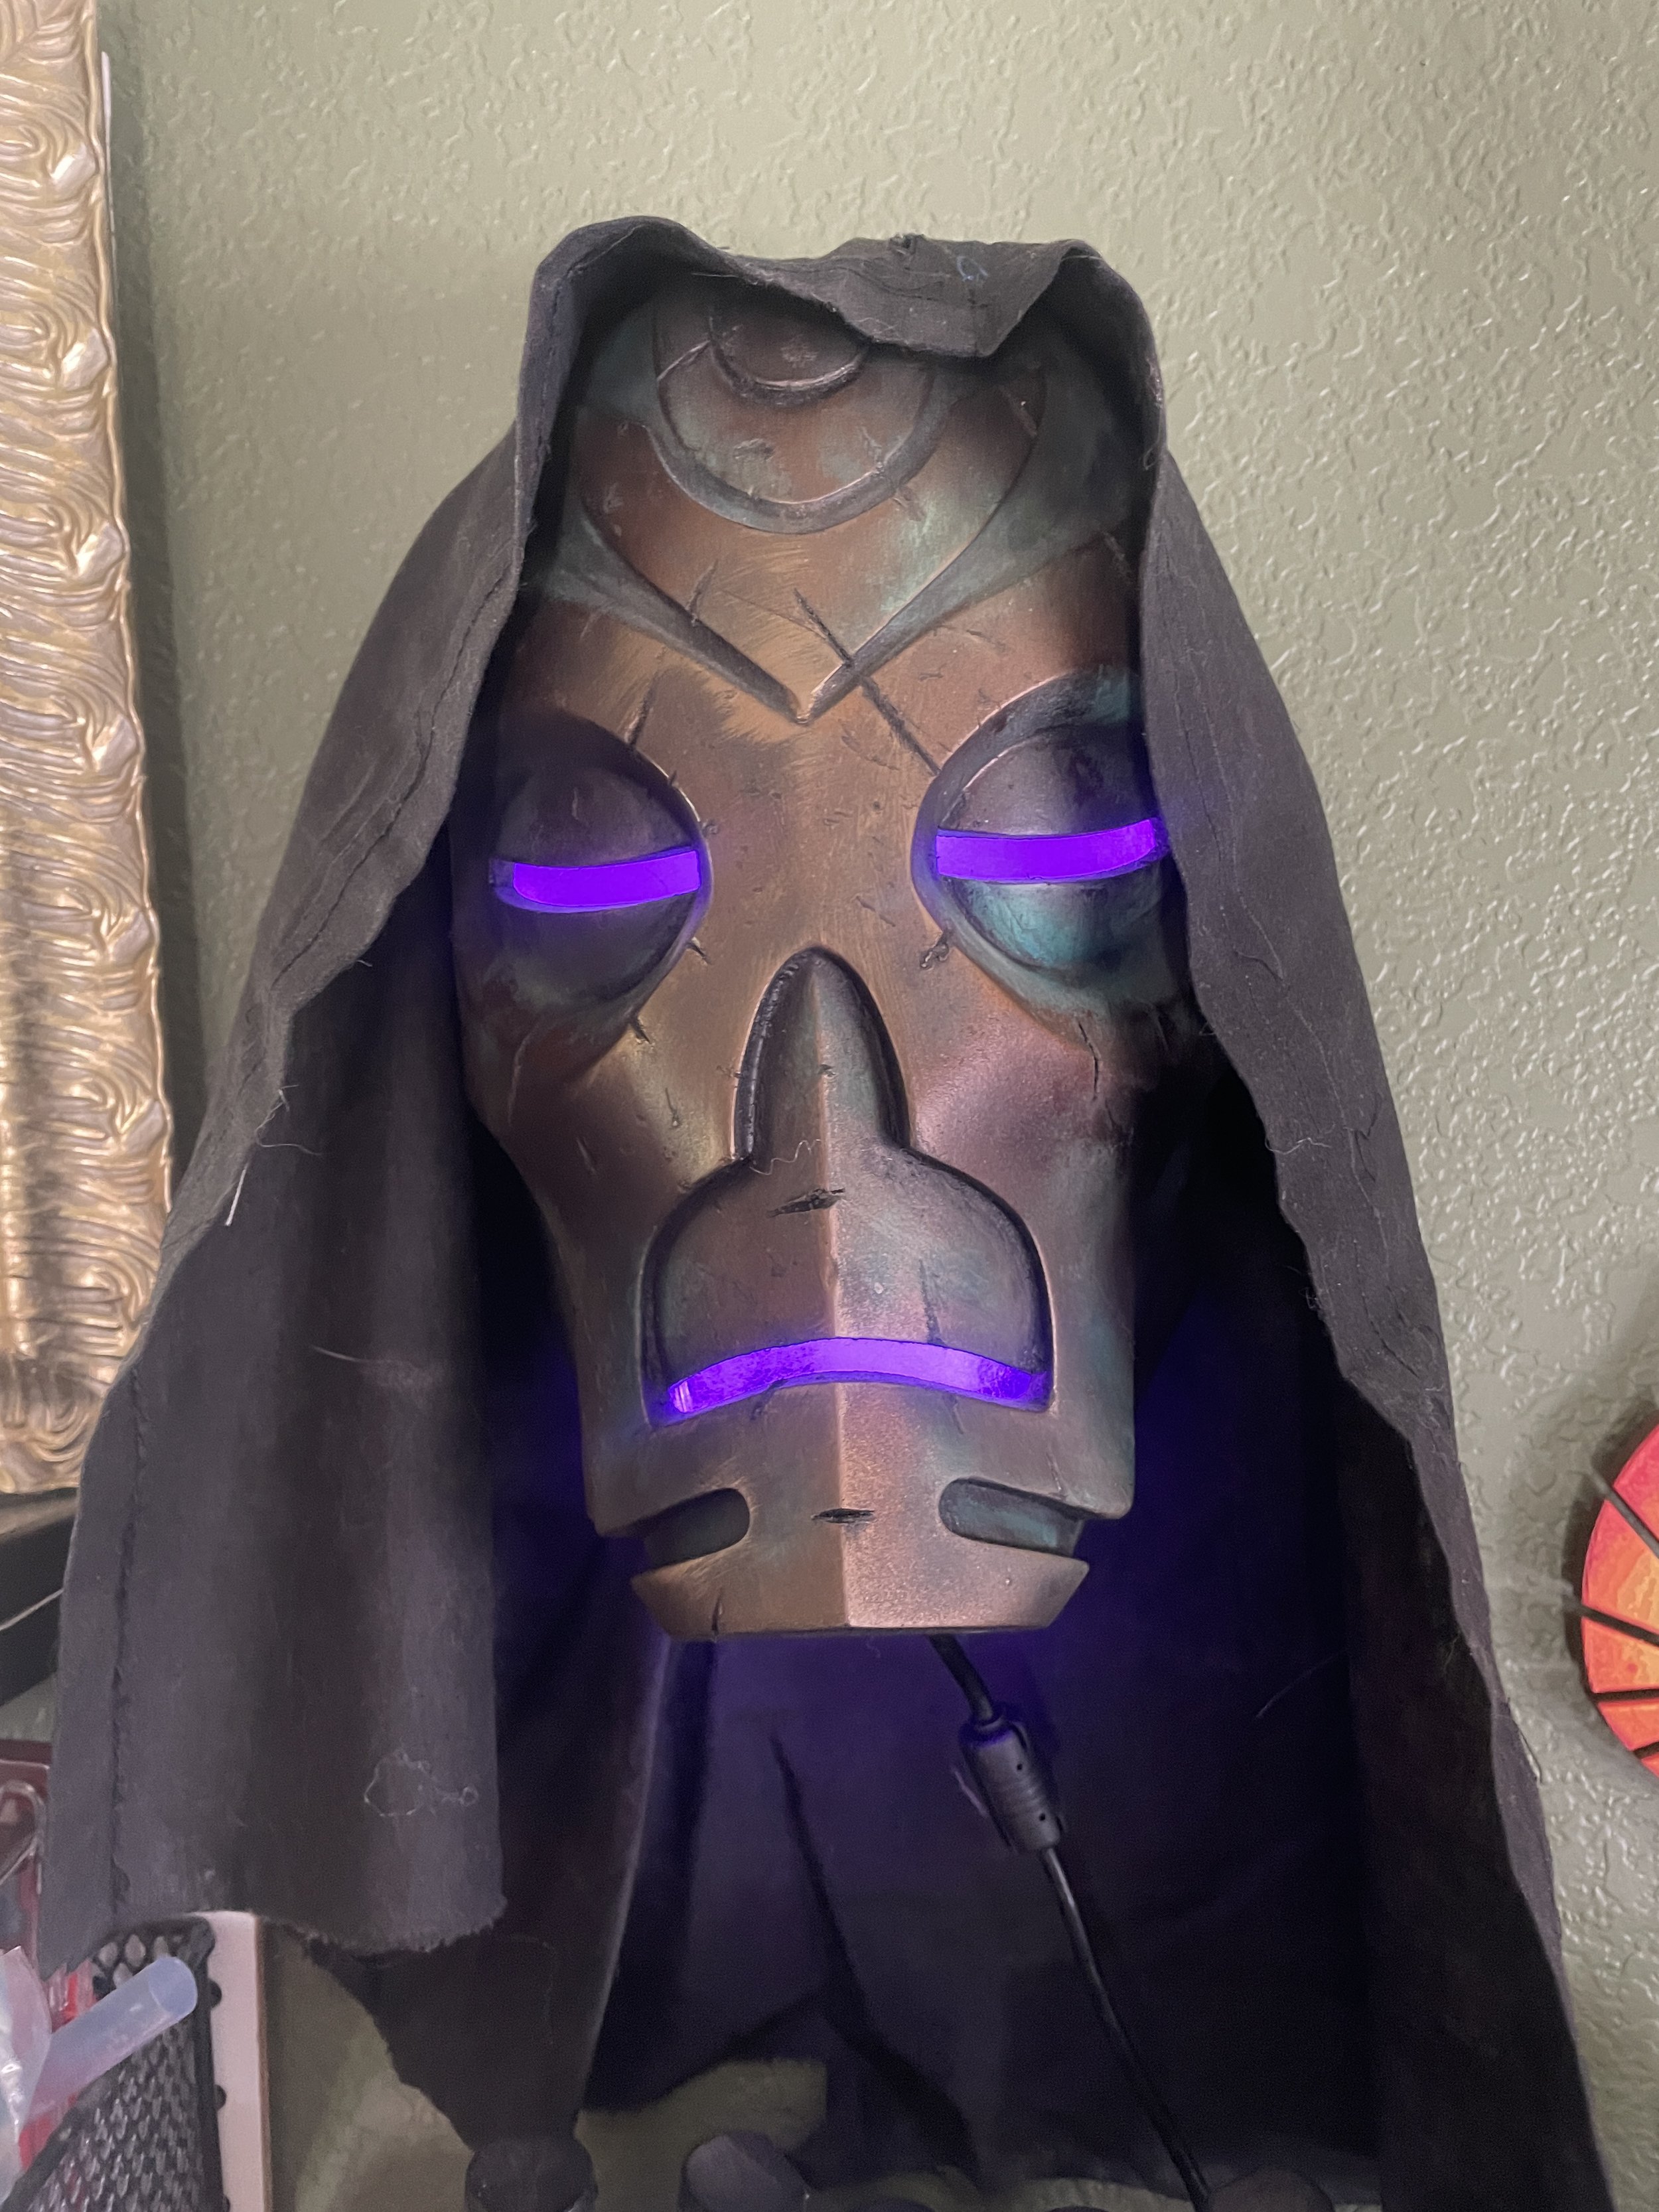
This Skyrim-inspired 3D-printed Dragon Priest mask, designed by Jtm, has been guarding our office, waiting for the sweet, sweet touch of LEDs. Today, this creepy severed head shall wear purple.

Supplies for Electronics

Pixel String Light
WiFi Development Board
Soldering Station (or whatever station you have)

Instructions

The seed pixels (the LEDs) have three wires. The marked one is for voltage, which gets soldered to the 5v hole on the ESP. The next one is for signal. I soldered that to D4. The final wire is for ground, and that one gets soldered to G.

Cut as much wire as you need for your project. We recommend using no more than 30 LEDs on an ESP board.

Next, install WLED on the board. You’ll need to install the drivers first. Then plug in WLED and follow their setup instructions. Your config should look something like this.

Configuration specs for programmable LEDs

Masterwork Tools is an Amazon Affiliate. We earn a small commission on qualifying purchases.

Everything is better with a portcullis

Add a portcullis to this 3D-printable curved stone wall to keep out the riffraff. Release includes concave and convex walls.

We want one of these for our real-life home, but it's probably against HOA regulations. So we live vicariously through tabletop gaming.

Add one -- or more -- to your curved walls for extra drama.

Grab the files
Patreon
Thingiverse
MyMiniFactory

Files are available now via Dropbox to our Patreon supporters. Files are posted to Thingiverse and MyMiniFactory later, as time permits. Check back if you don’t see them right away. 

Italian bow-tie cookies are a gift for your face hole

Italian bow-tie cookies covered in powdered sugar

Italian bow-tie cookies sprinkled with powdered sugar are worth the effort. Photo by Monica Jones

I used to help my first-generation Italian-American mother make these bow-tie cookies every Christmas when I was a kid. She made me promise I would continue the tradition after she died, and I’ve been keeping that promise for nine years. Whenever I think about taking a year off, her angry ghost yells at me with her hands until I do the right thing.

My mother’s original recipe, handed down by my grandmother, was lost shortly before mom died, so I searched online until I found this recipe. The cookies taste the same to me. My grandmother’s recipe was rubbish anyway — only a list of ingredients like “a glass of white wine,” with no indication how big the glass should be.

Fortunately, most of the recipes for these Italian cookies — and their Polish counterparts — are interchangeable.

Notes

  • I use a fluted pastry wheel to give the cookies a nice decorative edge. I also use the pastry wheel to create the bow-tie shape by cutting small slits in the strips of dough and gently flipping one edge of the dough through the slit. If you don’t want to buy a new kitchen gadget, you can use a small knife, or save time by pinching the dough in the middle.

  • Roll the dough with a rolling pin or a pasta roller. The pasta roller will take more time but will be easier on your arms and back.

  • These cookies are best if the dough is rolled paper thin before cutting. Roll out a small piece so you can test how thin you can go before they start falling apart in the shaping process. Add more flour to your surface if they stick. If you make them too thick, my grandmother will crawl out of her grave to slap you upside the head and make you do it over.

  • While you’re rolling and cutting pieces of dough, cover the rest with a damp towel to keep it from drying out. If the dough becomes too brittle to shape, spray it with a bit of water. Don’t overdo it. If it’s too sticky and wet, sprinkle it with flour until you can work with it again. It’s fine if the cookies dry out after you’ve shaped them.

  • If you need to pause your project, wrap the dough in a soaking wet towel until you can come back to it. You might need to sprinkle it with flour when you return if it’s too sticky. I haven’t tested this beyond a few hours, so I recommend you finish the cookies in a single day.


    Masterwork Tools is an Amazon Affiliate. We earn a small commission on qualifying purchases.

Don't cast Magic Missile at the darkness. 3D print a torch instead.

Add dimension to your dungeon layout by placing torches at varying heights. Files include concave (above) and convex (not pictured) options. Place torches on either side of the wall.

"However vast the darkness, we must supply our own light." -- Stanley Kubrick

Now you can supply your own light with these 3D-printable wall torches.

This monster release has a CR 30. Choose from torches at three different heights to satisfy your inner dungeon-design nerd. With 84 variations, you can place torches on either side of the wall.

Find instructions for lighting the torches as part of our tutorial on crafting an infinity hallway.

Grab the files

Patreon
Thingiverse
MyMiniFactory

Files are available now via Dropbox to our Patreon supporters. Files are posted to Thingiverse and MyMiniFactory later, as time permits. Check back if you don’t see them right away.