3D printing is a spectator sport

3D-printed iron flask illuminated with LEDs

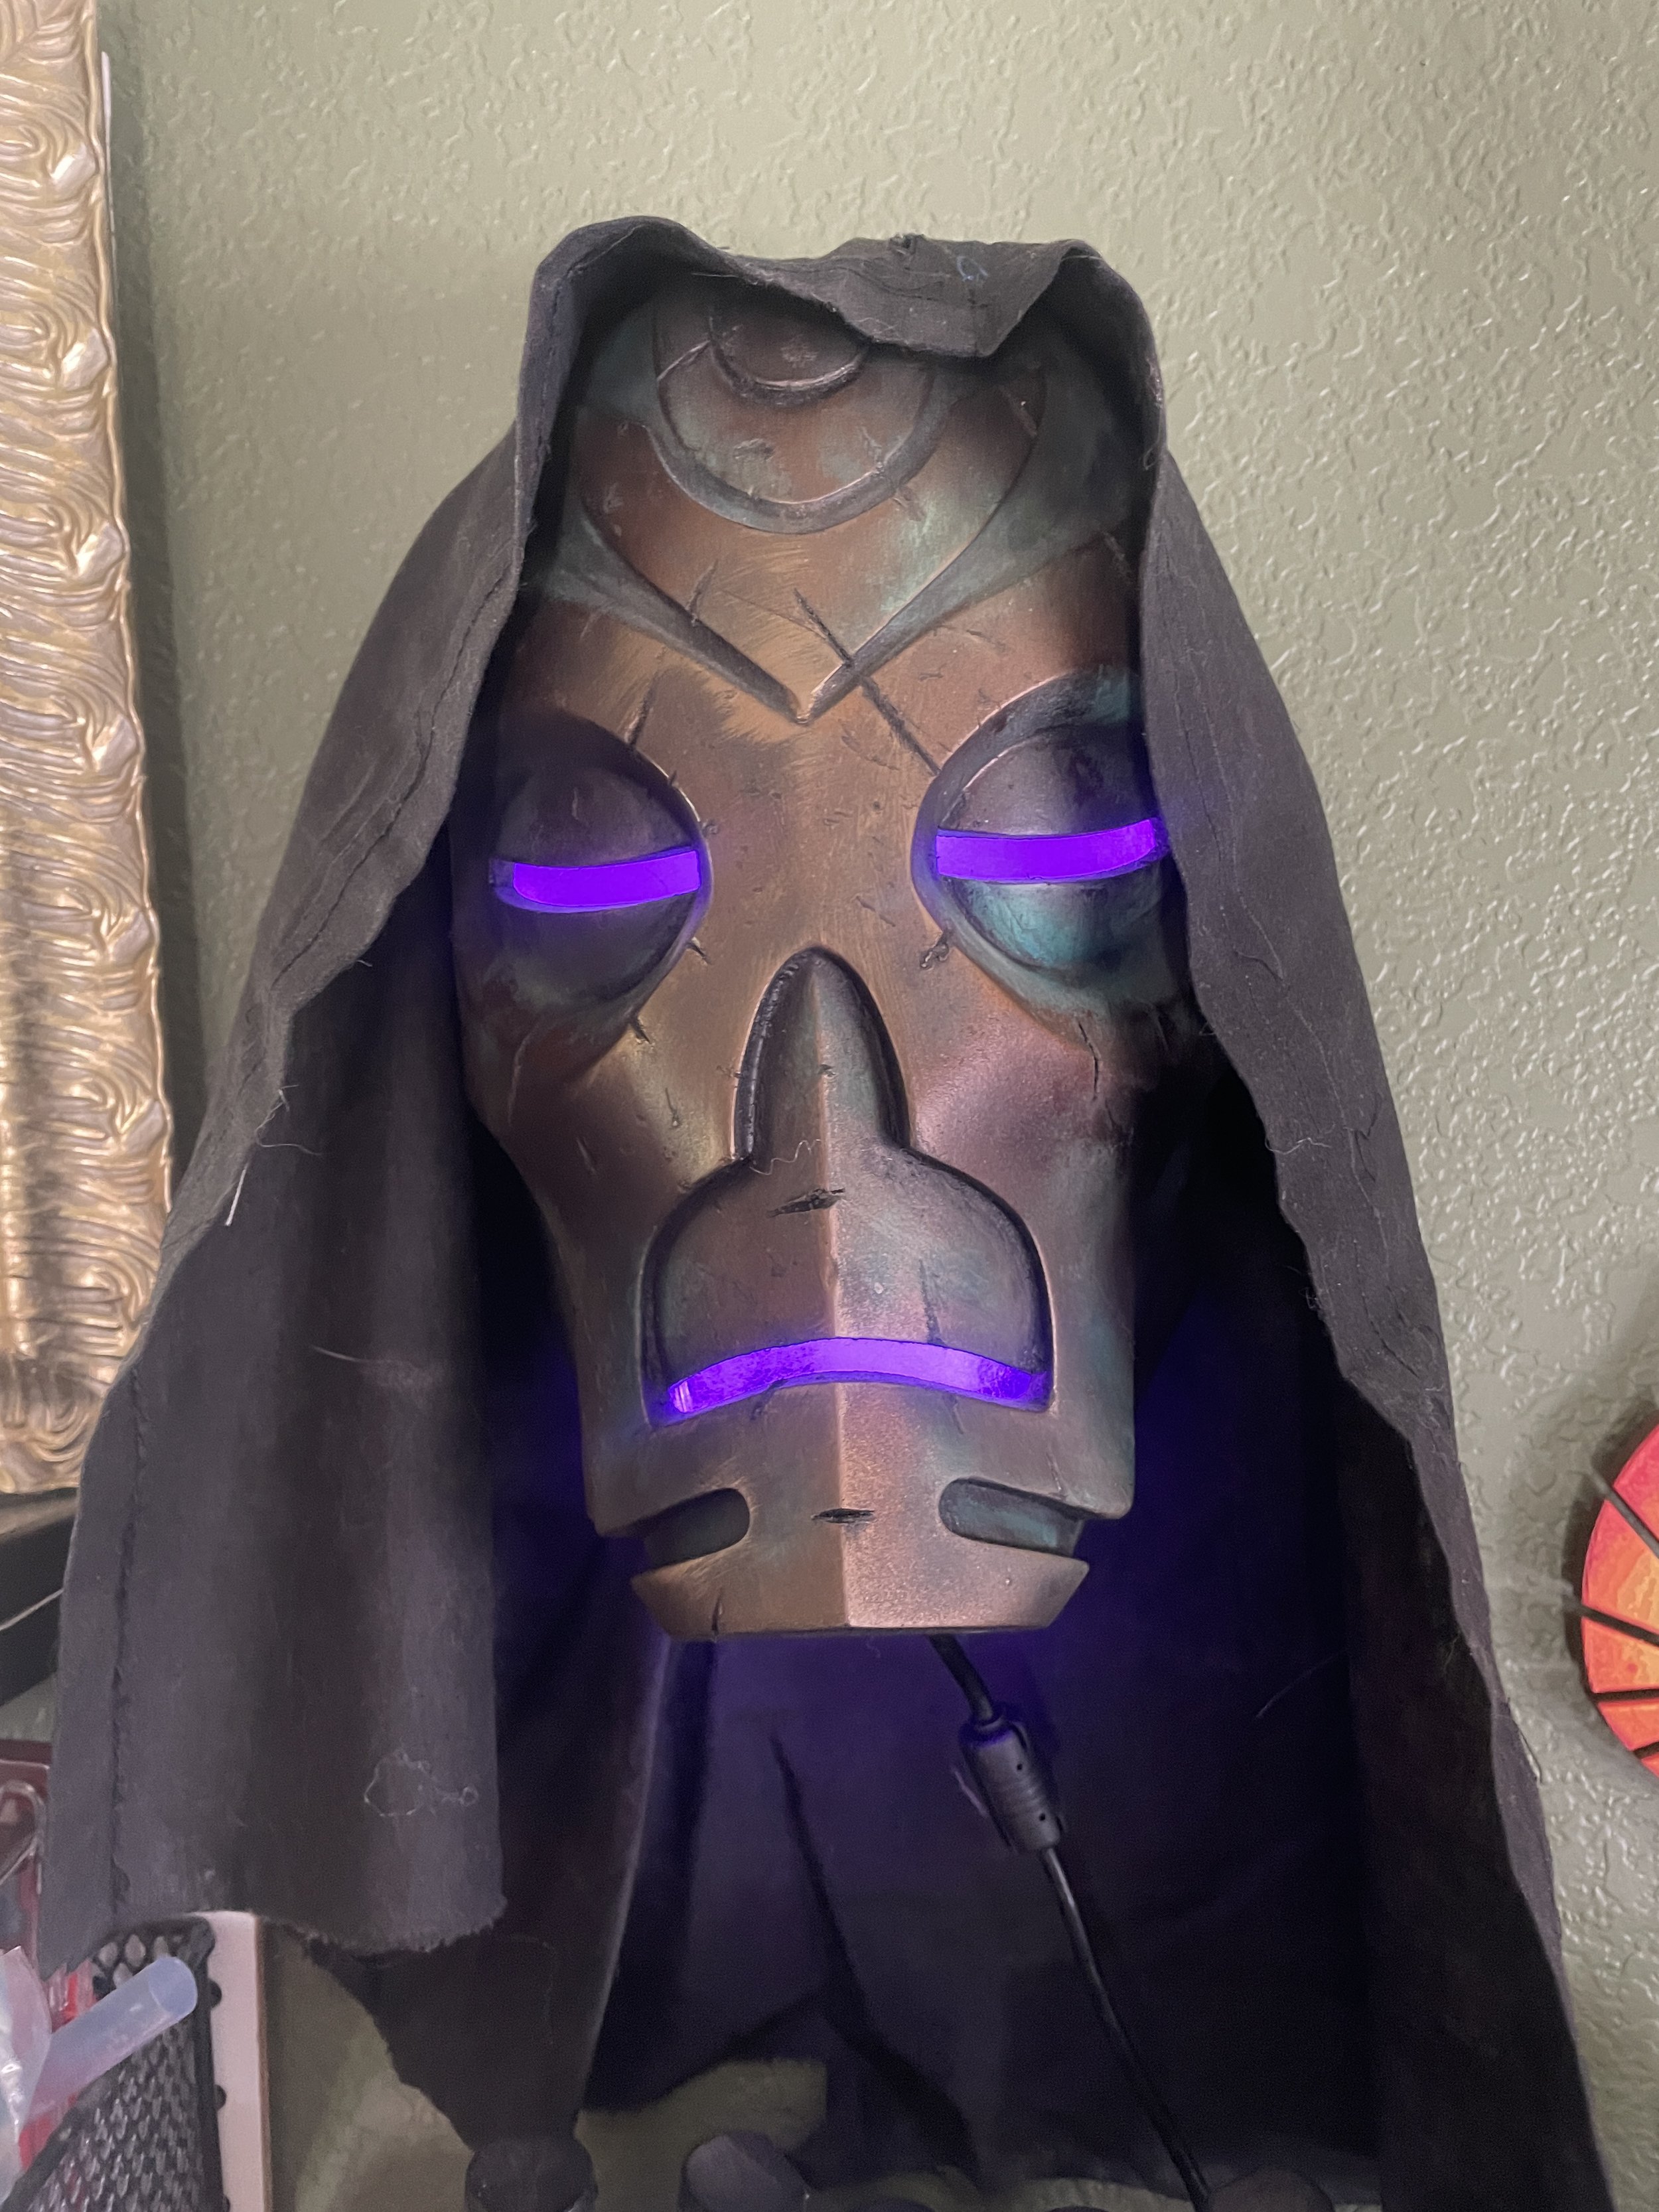
This illuminated iron flask sits patiently in our gaming room, waiting for some low-wisdom derp to throw it. Photo by Monica Jones

See what I did there? The headline is funny because in Baldur’s Gate 3, when you throw the iron flask, a spectator breaks free to show you what chaotic neutral is all about.

Oh shut up. I’m hilarious.

Anyway, Devon 3D-printed this iron flask, designed by Mark Pedersen, as a prop for our gaming room. He modified the original design to make the bottom detachable and added electronics for just a touch of menace.

Also, we know spectators are lawful neutral. It was just a stupid joke.

Supplies

For the body: Protopasta Stainless Steel Filled PLA 3D Printer Filament
For the eyes and mouth: Clear red SUNLU 3D Printer Filament
Sandpaper in multiple grits

Note: Devon sanded the body using 400-, 800-, 1000-, 2000- and 3000-grit sandpaper, in that order, to achieve a realistic metallic finish.

Instructions for electronics

The seed pixels (the LEDs) have three wires. The marked one is for voltage, which gets soldered to the 5v hole on the ESP. The next one is for signal. I soldered that to D4. The final wire is for ground, and that one gets soldered to G.

Cut as much wire as you need for your project. We recommend using no more than 30 LEDs on an ESP board.

Next, install WLED on the board. You’ll need to install the drivers first. Then plug in WLED and follow their setup instructions. Your config should look something like this.

Masterwork Tools is an Amazon Affiliate. We earn a small commission on qualifying purchases.

An elegant weapon for a more civilized age

Illuminated wall-mounted lightsaber display

Feeling kinda cute. Might slaughter all the younglings. IDK. This 3D-printed wall mount with programmable LEDs holds one of our lightsabers. Photo by Monica Jones

During our trip to Disneyland last year, Devon and I made custom lightsabers at Savi’s Workshop. Devon also bought a replica of Rey’s weapon, and I bought him a Darksaber for Father’s Day.

This is the way to a lot of lightsabers.

Don’t look at us like that. Normal people have lightsaber collections, and there’s nothing weird to see here.

A collection without a way to display it is just vendor trash, so Devon 3D printed wall mounts for our budding Jedi-Sith armory.

Supplies

Free STL files
Silk Silver PLA
Protopasta Steel Filled PLA
Hatchbox Black PLA
Overture clear PETG
Diffusion film
Right angle USB-C cable, 10 ft
Threaded inserts (M2 for grate, M3 for clip)
Socket-cap screws (M2 for grate, M3 for clip)
Heat-set insert tips
Soldering iron Make sure it's one compatible with the tips you get
Solder
ESP 8266 board, USB-C
Seed LEDs Amazon, AliExpress (We used the ones from AliExpress)
Wet or dry sandpaper, 150, 220, 400, 800, 1500, 3000 grit
Double-sided mounting tape
Pixel String Light
WiFi Development Board

Instructions

The seed pixels (the LEDs) have three wires. The marked one is for voltage, which gets soldered to the 5v hole on the ESP. The next one is for signal. I soldered that to D4. The final wire is for ground, and that one gets soldered to G.

Cut as much wire as you need for your project. We recommend using no more than 30 LEDs on an ESP board.

Next, install WLED on the board. You’ll need to install the drivers first. Then plug in WLED and follow their setup instructions. Your config should look something like this.

Sand the grate, moving up from 150 to 3000 grit, to get a realistic metallic shine.

Use thin strips of mounting tape to stick the LEDs inside and to hold the ESP on the back. Position it so the right-angle USB cable can seat reasonably.

Use a soldering iron to sink in the threads, and attach the clip to the front side of the grate.

Cut the diffusion paper to size, and sandwich it between the base and the grate. Attach the grate with the screws.

PRINTING NOTES

The mounts were printed on a Bambu, utilizing the AMS to use multiple filaments in the same print. If your printer can’t auto-swap filament, you can switch manually part way through the print.

The grate was printed using Silk Silver PLA with Protopasta Steel Filled PLA on the top four layers.

The clip was printed with Hatchbox Black PLA. The body was printed with the same, but Devon also used Overture clear PETG for the support interface to simplify removing the supports.

Masterwork Tools is an Amazon Affiliate. We earn a small commission on qualifying purchases.

Let your creepy light shine

Skyrim's Dragonpriest mask, with custom lighting

This 3D-printed Dragon Priest mask is illuminated with programmable LEDs. Photo by Monica Jones

Before Christmas, Devon dove back into an old hobby — electronics — when he strung year-round programmable LEDs across the front of our house. Now he must illuminate all the things, and nothing is safe.

This Skyrim-inspired 3D-printed Dragon Priest mask, designed by Jtm, has been guarding our office, waiting for the sweet, sweet touch of LEDs. Today, this creepy severed head shall wear purple.

Supplies for Electronics

Pixel String Light
WiFi Development Board
Soldering Station (or whatever station you have)

Instructions

The seed pixels (the LEDs) have three wires. The marked one is for voltage, which gets soldered to the 5v hole on the ESP. The next one is for signal. I soldered that to D4. The final wire is for ground, and that one gets soldered to G.

Cut as much wire as you need for your project. We recommend using no more than 30 LEDs on an ESP board.

Next, install WLED on the board. You’ll need to install the drivers first. Then plug in WLED and follow their setup instructions. Your config should look something like this.

Configuration specs for programmable LEDs

Masterwork Tools is an Amazon Affiliate. We earn a small commission on qualifying purchases.